

Start a scan
Select repositories, choose an audit type and scope, review the fixed quote, and launch.
Start with the Projects view under Code Security in the sidebar.
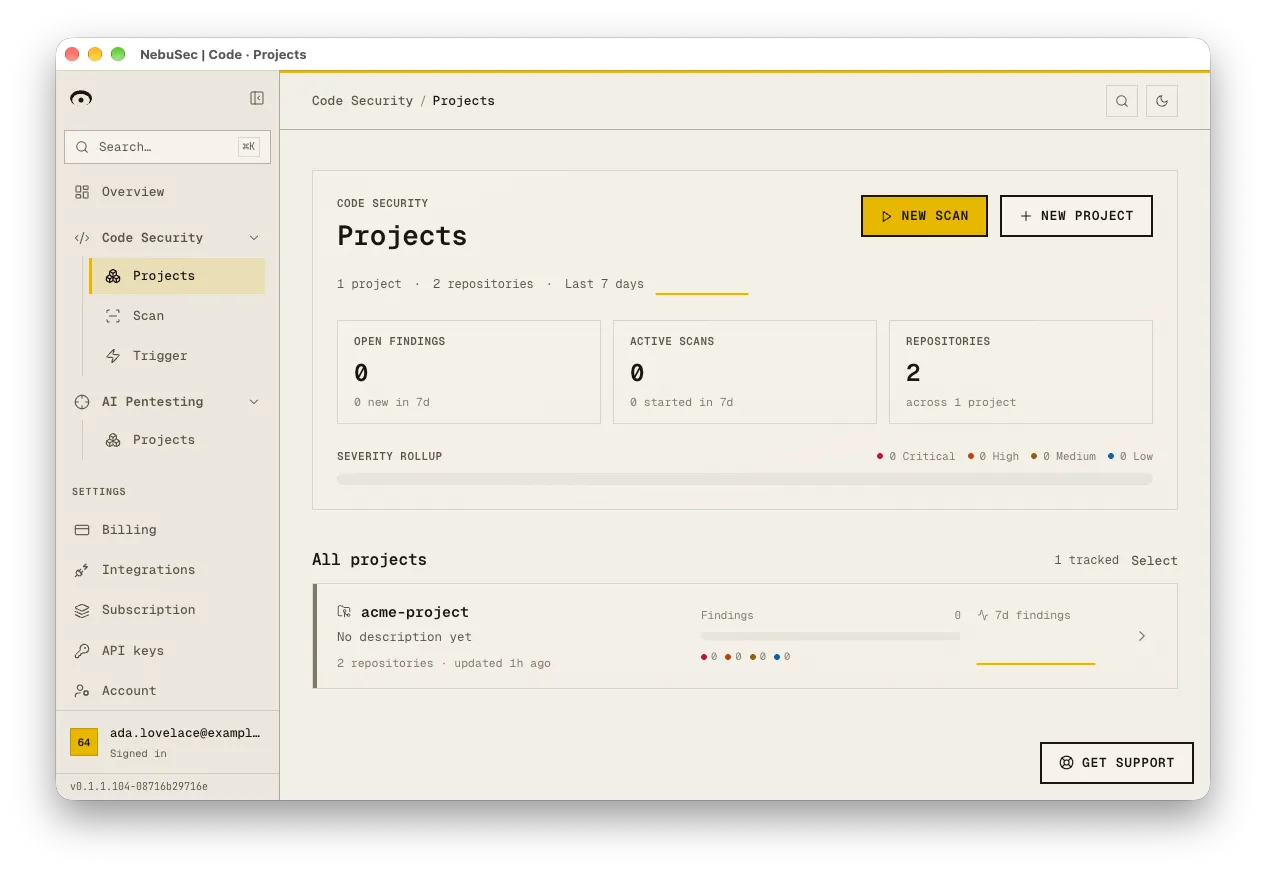
Open New scan after the repository status is Ready and a source snapshot is available.
The number of repositories you select determines the workflow:
- Select one repository for the complete single-repository scan options.
- Select two or more repositories for one multi-repository scan within the selected project.
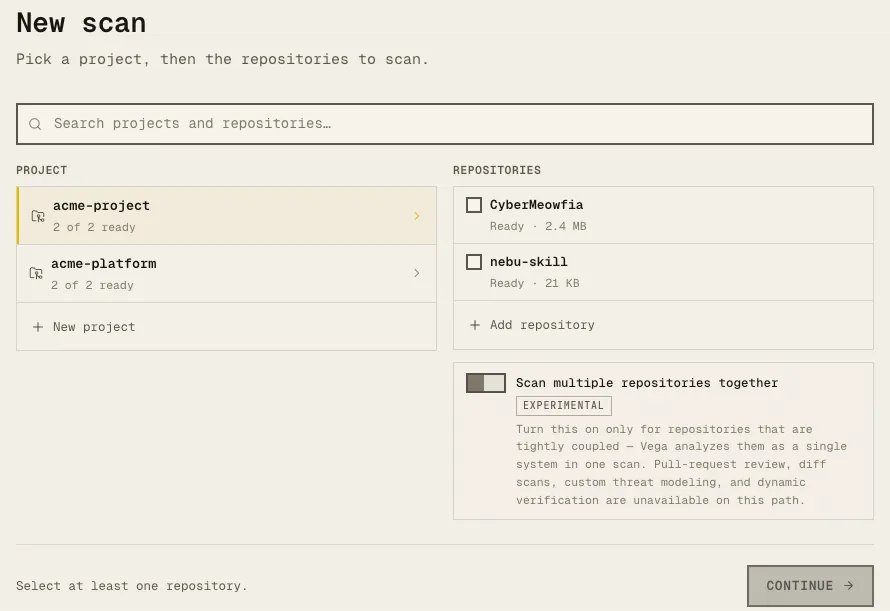
Select the target
- Open New scan.
- Choose the project that owns the repositories.
- Select one Ready repository, or enable multi-repository selection and choose two or more Ready repositories from that project.
- Select Continue.
Configure a single-repository scan
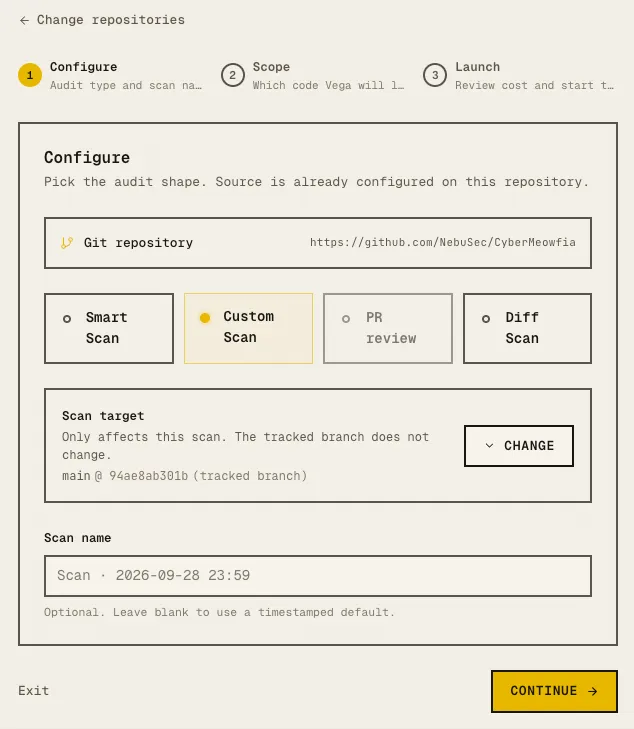
Choose the audit type that matches the question you want the scan to answer.
| Audit type | What it analyzes | When to use it |
|---|---|---|
| Smart Scan | Security-critical objectives identified from the repository. The selected objective folders become the scope, and Standard depth is applied automatically. | Use for a focused scan of the application’s most important security goals or components. |
| Custom Scan | Source files selected in the repository tree. Recommended source files are selected by default; filtered files remain visible but unchecked. | Use when you need direct control over file scope and depth. |
| PR review | The head of an open pull request and the files changed in that pull request. | Use for a GitHub App repository when reviewing a proposed change. A forked pull request may not support patch write-back. |
| Diff Scan | The difference between an older commit and a selected newer commit. | Use to review changes between two versions of a source that supports branch, tag, or commit selection. |
For Smart Scan, Custom Scan, and Diff Scan, changing the branch, tag, or commit affects only this scan. It does not change the repository’s tracked branch. The scan name is optional; leaving it blank creates a timestamped name.
Choose the scope
For Smart Scan, select the security objective that best represents what you want to test. Nebu converts the objective into a focused source scope.
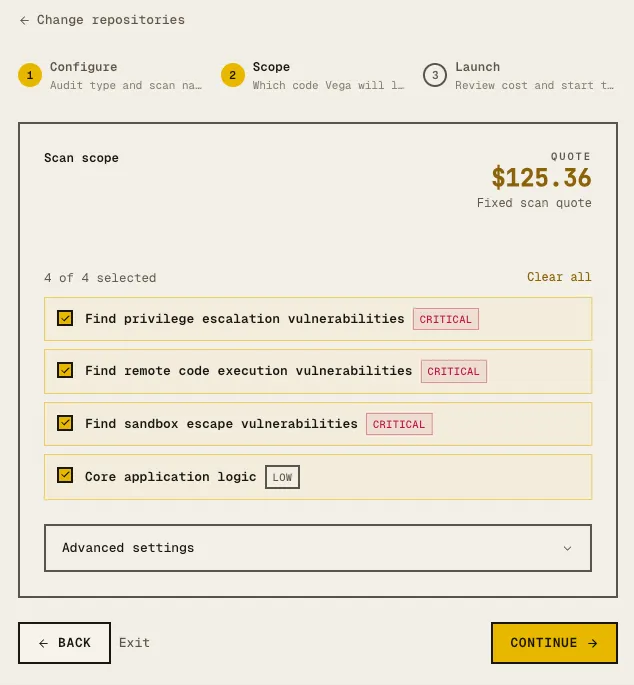
For Custom Scan, review the recommended file tree, then check or uncheck files to define the source scope. At least one objective or source file must be selected.
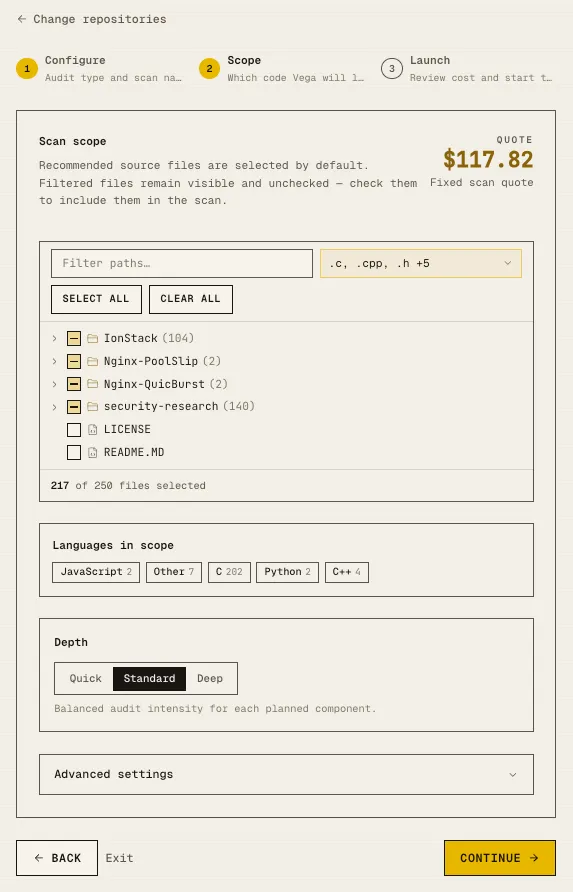
See Scan options before changing depth or advanced settings.
Review the quote and launch
- Confirm the repository, audit type, scan name, depth, and source files or changed files in scope.
- Review the fixed scan price and any promotion or scan credit. If Nebu requires a balance top-up, complete it before launch.
- If reusable scan artifacts are detected, decide whether to reuse them or force a full rescan.
- Launch the scan before the quote expires. If the configuration changes, review the refreshed quote before launching.
The amount shown on the Launch page is the final amount charged for that scan when the selected options remain unchanged.
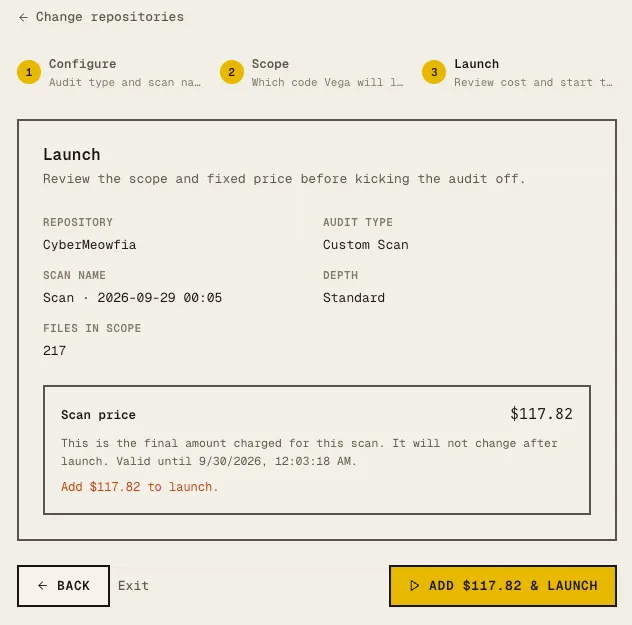
After launch
Open the scan detail to follow progress. When the scan completes, start with Critical and High findings, review the evidence and affected code, and check generated patches before applying them or opening a pull request.
